https://dishmagazine.com
  • Recipes
    • Сategories
      • Baking
      • Chicken
      • Cocktails
      • Desserts
      • Drinks
      • Fast Food
      • Fish
      • Main Dishes
      • Meat
      • Pizza
      • Salads
      • Sauces
      • Seafood
      • Snacks
      • Soups
    • Cuisines
      • American
      • Chinese
      • European
      • French
      • Georgian
      • Italian
      • Japanese
      • Spanish
      • Thai
      • Ukrainian
      • Uzbek
      • Vietnamese
    • Search by Ingredients
  • Food blog
  • Info
    • About Us
    • Contact
    • Terms & Privacy
  • Recipes
    • Сategories
      • Baking
      • Chicken
      • Cocktails
      • Desserts
      • Drinks
      • Fast Food
      • Fish
      • Main Dishes
      • Meat
      • Pizza
      • Salads
      • Sauces
      • Seafood
      • Snacks
      • Soups
    • Cuisines
      • American
      • Chinese
      • European
      • French
      • Georgian
      • Italian
      • Japanese
      • Spanish
      • Thai
      • Ukrainian
      • Uzbek
      • Vietnamese
    • Search by Ingredients
  • Food blog
  • Info
    • About Us
    • Contact
    • Terms & Privacy
  • Home
  • Food blog
  • Secrets of making yeast dough

Secrets of making yeast dough

tips from Chef Hanna
Posted on Mar 29th, 2024
by Chef Hanna
Categories:
  • Food blog
  • Baking
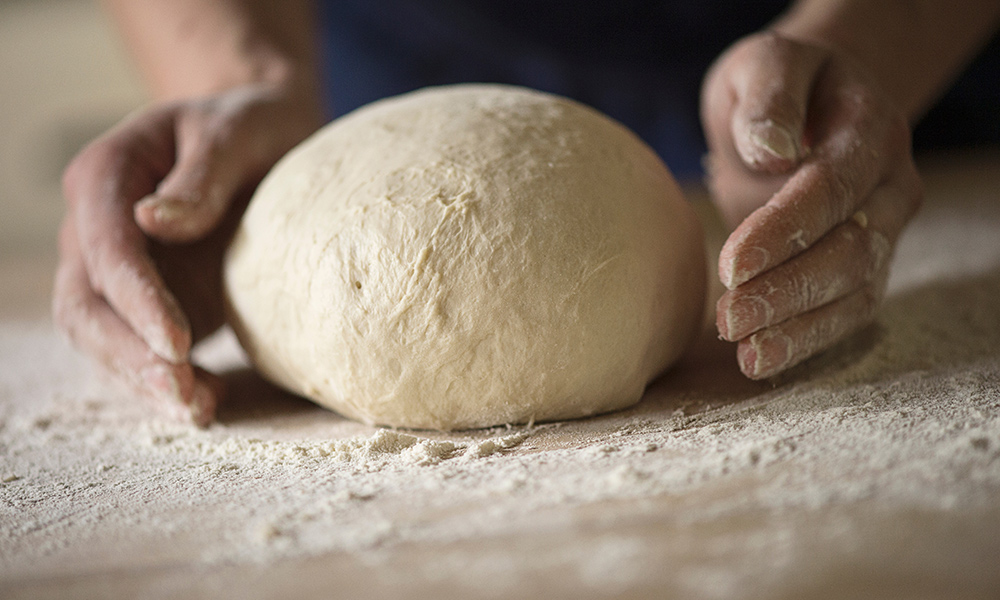
Secrets of making yeast dough

How to make the dough so that it is lush, fragrant and balanced in taste?
● Flour has different strengths. We are guided by the protein content: the more protein, the stronger the flour and the faster the kneading process.
● There are live and dry yeast. We keep them alive in the refrigerator, do not pack them, be sure to follow the expiration date.
Dry ones are used in smaller quantities (three times). It is important to use exactly the yeast specified in the recipe, and if a replacement is still necessary, make it proportionally, not 1:1!
● There are different types of yeast dough – ordinary and buttery. Buttermilk differs in that it contains sugar and dairy products. Due to this, it turns out to be much tastier than the usual one, which contains only yeast, flour and water.
● To activate the yeast, heat the liquid (milk or water) to
30C. We prefer milk, because despite the fact that the reaction will also occur with water, the taste of the dough will be more sour and fresh.
● When sugar is added to the yolks, a burning reaction occurs, lumps are formed, which later cannot be broken by anything, so it is very important, when adding sugar to the eggs, to mix them immediately, at least minimally with a fork.
● Flour, which you are sure of, can not be sifted (provided it is properly stored).
● The dough turns out to be too dense, tight, if we added flour to much. It is important to follow the proportions and carefully knead the dough until the gluten works
● It is important to bake the classic biscuit dough right away, it does not like to wait, but the dough, which contains fat (oil), can wait. For example, you bake one half first, then the other. Oil gives the dough more elasticity.

It is very important to strictly observe the temperature regime. If the temperature in the oven is too high, the filling will break the dough, and if the temperature is low, the dough will not be able to rise.

● Ready dough can be frozen. Defrost in the refrigerator, then let it rise in a warm place. Then you can make pies/cakes from it.
● In the package, the dough can be stored in the refrigerator for 2 days.
● It is better to stand no more than three times.
● Please note that for pies with meat, we measure out 90 g of dough, they turn out to be the size of the palm of your hand. And for pies with cherries – 50 g of dough.
● You can take milk of different fat content, but not less than 1.8%. Synthetic milk (for example, almond) is not suitable for yeast dough.

Chef Hanna

Categories

Baking

Baking

Chicken

Chicken

Cocktails

Cocktails

Desserts

Desserts

Drinks

Drinks

Fast Food

Fast Food

Fish

Fish

Main Dishes

Main Dishes

Meat

Meat

Pizza

Pizza

Salads

Salads

Sauces

Sauces

Seafood

Seafood

Snacks

Snacks

Soups

Soups

Cuisines

American

American

Chinese

Chinese

English

English

European

European

French

French

Georgian

Georgian

German

German

Italian

Italian

Tags

Avocado baking basil beef cake cheese cheesecake chicken chicken breast cocktail cottage cheese cream soup dessert dough Drinks duck Easter Easter cake egg eggplant fish ginger meat mushrooms orange pie pizza pork potatoes pumpkin quick rice roll salad salmon Sauces Seafood shrimps Snacks soup tea tomatoes vegan vegetables Zucchini
ads

dish_magazine

Quick recipes for every day

Teriyaki shrimp Pat the shrimp dry with paper tow Teriyaki shrimp

Pat the shrimp dry with paper towels before cooking. This helps them brown evenly and prevents them from steaming in the pan.

Make sure your frying pan is hot before adding the shrimp. A hot pan ensures a nice sear and prevents sticking.

Shrimp cook quickly, so use high heat to get a good sear without overcooking them.

Use flavorful oils like olive oil or sesame oil for cooking shrimp. They add extra depth of flavor.

PREPARING THE SHRIMPS

1.You can use a small knife or a deveining tool to make a shallow cut along the back of the shrimp and remove the vein.
2. Rinse the peeled shrimp under cold water to remove any remaining fragments or debris.
3. Use paper towels to pat the shrimp dry before cooking. This helps ensure they brown evenly and prevents them from steaming in the pan.
4. Marinate the shrimp: In a bowl, mix together the teriyaki sauce, fresh lime juice, soy sauce and minced garlic.
5. Add the peeled shrimp to the marinade, toss to coat, and let it marinate in the refrigerator for at least 15-20 minutes.

COOKING THE SHRIMP

1. In a large skillet, melt the butter over medium-high heat until it begins to bubble.
2. Once the butter is melted and bubbly, add the marinated shrimp to the skillet. Cook for 1-2 minutes on each side, or until the shrimp turns pink and opaque. Be careful not to overcook the shrimp, as they can become rubbery.
3. Pour the remaining marinade into the skillet with the shrimp. Allow it to come to a simmer and cook for an additional 1-2 minutes, or until the sauce thickens slightly and coats the shrimp.
4. Remove the skillet from the heat.
5. Shrimp can be sprinkled with herbs. The dish should be consumed hot.

Bon appetit!

More recipes you can find here: dishmagazine.com

#food #mealprep #meal #recipe #shrimp # dinner
Crispy fried mozzarella Crispy fried mozzarella i Crispy fried mozzarella

Crispy fried mozzarella is perfect as an appetizer for both a festive table and an everyday snack.
You can choose the sauce to your taste. I prefer to serve fried mozzarella with ketchup.

1. Beat the egg a little.
2. Place breadcrumbs in a deep bowl.
3. Heat vegetable oil for deep-frying.
4. Dip each mozzarella ball first in the egg, and then in the breadcrumbs.
5. Place each mozzarella ball in the fryer and fry until lightly golden brown.
6. The cheese itself is very soft, we just need to warm it up a little and add crunch to the crust, so don’t overdo it. 
More recipes you can find here: dishmagazine.com

#recipe #food #meal #mealprep #mozzarella
Quick tom yum soup WITH SHRIMP AND COCONUT MILK P Quick tom yum soup
WITH SHRIMP AND COCONUT MILK

PREPARING INGREDIENTS FOR SOUP

1. Boil chicken broth; for this soup you need approximately 1 liter. I left a link to the chicken broth recipe in the description.
2. Wash and peel the shrimp.
3. Wash and coarsely chop the mushrooms. You can use shiitake mushrooms, but I use button mushrooms in this recipe.
4. Wash and cut the cherry tomatoes in half.

PREPARING SOUP

1. Place a thick-bottomed pan on the fire, add coconut oil or other fragrant oil to your taste.
2. Throw chopped garlic and pre-chopped mushrooms into the pan.
3. Fry the mushrooms until golden brown, but do not overcook, now add the cherry tomatoes.
4. Add tom yam paste, fish sauce, palm sugar, lime juice and coconut milk.
5. Now add the chicken broth preheated to a boil.
6. When the chicken broth and mushroom mixture comes to a boil, reduce the heat to low and add the shrimp.
7. Cook the soup until the shrimp turn pink, as soon as the shrimp are no longer transparent, turn off the soup.
8. Pour the tom yam soup into serving bowls and garnish with fresh cilantro leaves.

Bon appetit!

More recipes you can find here: dishmagazine.com

#mealprep #recipe #tomyum
Eggplant sweet pepper stew AJAPSANDAL STEWED IN A Eggplant sweet pepper stew
AJAPSANDAL STEWED IN A FRYING PAN

PREPARATION OF INGREDIENTS

1. Wash, cut off the tails of the eggplants, cut into cubes.
2. Peel the onion and cut into cubes.
3. Remove seeds from sweet peppers and chop coarsely.
4. Wash and coarsely chop the tomato. For this dish you need one large or a couple of medium tomatoes.
5. Place the frying pan on the heat and fry the onions, eggplants and bell peppers one by one in a small amount of olive oil.

PREPARING THE DRESSING
1. Place tomatoes and peeled garlic in a blender.
2. Add spices, lemon juice, honey, salt, pepper.
3. Blend in a blender until smooth.

PREPARING THE DISH
1. Place the fried vegetables in a saucepan or large frying pan with a thick bottom.
2. Pour over the dressing, stir, add fresh cilantro leaves, cover and simmer over low heat until the vegetables are tender, about 15 minutes.
3. Divide the dish among plates and garnish with fresh cilantro leaves.

More recipes you can find here: dishmagazine.com

#food #mealprep #vegetables #vegan #dinner
Homemade Tartar Sauce PREPARATION 1. In a deep b Homemade Tartar Sauce

PREPARATION

1. In a deep bowl, mix sour cream and homemade mayonnaise.
2. Cut the pickled cucumbers (it’s better to take pickled gherkins) into small cubes. Add to sour cream and mayonnaise.
3. Peel and finely chop the garlic, also add to sour cream and mayonnaise, pepper the sauce to taste and mix well.
4. Leave to stand in the refrigerator for 15 minutes so that all the flavors mix and open.

The sauce is ready!

More recipes you can find here: dishmagazine.com

#mealprep #recipe #sauce #dinner #food
Dorado fillet WITH PUMPKIN PUREE AND GREENS Easy Dorado fillet
WITH PUMPKIN PUREE AND GREENS

Easy and very tasty dish fried dorado fillet.
The main thing in this recipe is not to overcook the fish, dorado fillet should be fried for no more than a minute on each side.
I serve this dish with pumpkin puree, you can find the recipe here: https://dishmagazine.com/recipe/pumpkin-puree/

PREPARATION

1. Rinse and dry with a paper towel fillet Drado. Pepper and salt the fish.
2. Pour olive oil into the pan, add several twigs of thyme to it.
3. When the oil in a pan heats up, put the drado fillet into it.
4. Fry the fish one minute on each side.
5. Frying fish, before serving, can be slightly sprinkled with lemon juice. You can serve a dorado fillet with rice and salad. I like a combination of fish, pumpkin puree and fresh arugula, sprinkled with olive oil and lemon juice.

Bon appetit!

#food #meal #mealprep #mealprepideas  #dinner #fish #dorado #recipe
Follow on Instagram
Comments Box SVG iconsUsed for the like, share, comment, and reaction icons
Cover for Dish Magazine
247
Dish Magazine

Dish Magazine

Quick recipes for every day

Dish Magazine is in Washington, United States.
7 months ago
Dish Magazine

Georgian Khinkali (juicy dumplings recipe)
IN A CREAMY SAUCE

FILLING

1. In a large bowl, combine ground pork, ground beef, salt, pepper, chopped cilantro and parsley, minced garlic, and onion.
2. Add water to the filling. Mix well until smooth.

DOUGH

1. In a deep bowl, mix 700 g of flour, 320 ml of cold water and ½ tsp. salts Knead a uniformly hard dough.
2. Place the dough in the refrigerator for 30 minutes, covered in grub.

THE CREAMY SAUCE AND PREPARATION

1. Remove the dough from the refrigerator, seal the surface with flour and roll it out a couple of millimeters. Divide into circles 14 cm in diameter.
2. Place 1 tbsp on each circle. fillings. Form khinkali by folding the dough into folds to the top, there may be 10-12 folds of dough.
3. Boil the water in a large saucepan, reduce the heat so that the boil is weak and cook the quincales for 5 minutes.
4. While the khinkali are cooking, quickly prepare the cream sauce: combine the cream, mayonnaise, and crushed garlic, mix well, pour into a large, deep frying pan, and heat thoroughly.
Place the cooked khinkali in the pan with the cream sauce, sprinkle with a little dried tomato flakes.

Serve hot. Dip the khinkali in the creamy sauce first, then take a bite and drink the broth, and then eat the khinkali itself. Don’t eat the tails—they’re only there to hold the khinkali.

More recipes you can find #food #meala#mealprepm#dinnerd#recipe##GeorgianFoodn#dumplings #georgianfood #dumplings
... See MoreSee Less

Georgian Khinkali (juicy dumplings recipe)
IN A CREAMY SAUCE

FILLING

1. In a large bowl, combine ground pork, ground beef, salt, pepper, chopped cilantro and parsley, minced garlic, and onion.
2. Add water to the filling. Mix well until smooth.

DOUGH

1. In a deep bowl, mix 700 g of flour, 320 ml of cold water and ½ tsp. salts Knead a uniformly hard dough.
2. Place the dough in the refrigerator for 30 minutes, covered in grub.

THE CREAMY SAUCE AND PREPARATION

1. Remove the dough from the refrigerator, seal the surface with flour and roll it out a couple of millimeters. Divide into circles 14 cm in diameter.
2. Place 1 tbsp on each circle. fillings. Form khinkali by folding the dough into folds to the top, there may be 10-12 folds of dough.
3. Boil the water in a large saucepan, reduce the heat so that the boil is weak and cook the quincales for 5 minutes.
4. While the khinkali are cooking, quickly prepare the cream sauce: combine the cream, mayonnaise, and crushed garlic, mix well, pour into a large, deep frying pan, and heat thoroughly.
Place the cooked khinkali in the pan with the cream sauce, sprinkle with a little dried tomato flakes.

Serve hot. Dip the khinkali in the creamy sauce first, then take a bite and drink the broth, and then eat the khinkali itself. Don’t eat the tails—they’re only there to hold the khinkali.

More recipes you can find here: dishmagazine.com 

#food #meal #mealprep #dinner #recipe #georgianfood #dumplingsImage attachmentImage attachment+2Image attachment
View on Facebook
· Share
Share on Facebook Share on Twitter Share on Linked In Share by Email
View Comments
  • Likes: 1
  • Shares: 0
  • Comments: 0

Comment on Facebook

  • About Us
  • Contact
  • Terms & Privacy

ALL RIGHTS RESERVED | © 2026

EN
UA RU ES